
A bit of history (part 17) – A mystery resolved
- ainsworthashley
- Sep 19, 2017
- 4 min read

At this stage the history of this project is going to briefly fall out of chronological order to an extent, I want to group the next phase of development into discrete areas (such as engine, chassis, wiring, etc), although in reality most of the following sub-projects were completed over the same period.
So- onwards with the never ending engine saga, last time we left it the engine was on it’s way to Peter for an extremely detailed strip down following his discovery of damage to the main bearings, presumably in relation to the mystery whirring noise I had been unable to resolve.
January 2014 and Peter has stripped down the motor, the block and crank have then gone to the machine shop for measuring and we get the initial results back:
The main bearing caps in the block are straight, round and running true…so the block is sound.
The crank is scored on the main journals (unsure if this will polish out), and appears to be bent! However it is still within Toyota’s tolerance…if you measure it end to end then it is 0.002” out of true.
However…if you measure the mid-point to the flywheel it is straight, and then measure from the mid-point to the timing end it is 0.002” out of true. In other words all the bend is at the front half of the crank shaft…
This certainly ties up with the strange wear on main bearings number 1 and 2, and that number 3 looked highly polished. Perhaps this was a result of the nitriding process after the big end journals were turned down to accept 3S rods…although ultimately it doesn’t matter, the important thing is we found the problem so we can fix it!
How to fix it? Three options jumped out:
Buy a new crank- expensive, and ultimately the new one might be bent as well, plus it would need all the relevant machining done on it again…
Polish the main bearing journals on the crank to see if the score marks will come out, and then get the crank professionally straightened…however they do that!
Have the main crank journals turned down one bearing size, and in doing so re-align the center points of the journals so that the crank is truly straight, and the score marks will be fully removed.
Of these, the third option seemed to make most sense as it guaranteed the end product would be as required, so the machine shop went back and verified all their measurements, and cracked on with the work…one full engine re-build coming up.
Let the upgrades commence…

As thoroughly depressed as I was at having to (re-)build yet another engine, I was also relieved to have found the issue and to be working with Peter to resolve things once and for all…I cannot compliment Peter enough for his patience with me and this project, he was true to his word and fully humored me by going into all the details and double checking everything.
To cheer myself up I figured I would take the opportunity to address a few concerns I had about the initial build, and improve things. The first up was the con-rods, I had initially used Eagle forged rods, which are a great “budget” forged con-rod…but I wanted something stronger to take everything I could throw at it, and guaranteed to take it.
Enter a set of Carillo pro h-beam rods with CARR multiphase bolts, basically the strongest combination Carillo make for this engine…nice!
After the great results I saw on my track car build, I also decided to upgrade to Total Seal piston rings, which did mean the bores would need re-honing, and the engine running in again…but I was happy to accept that in exchange for the potential increase in compression.
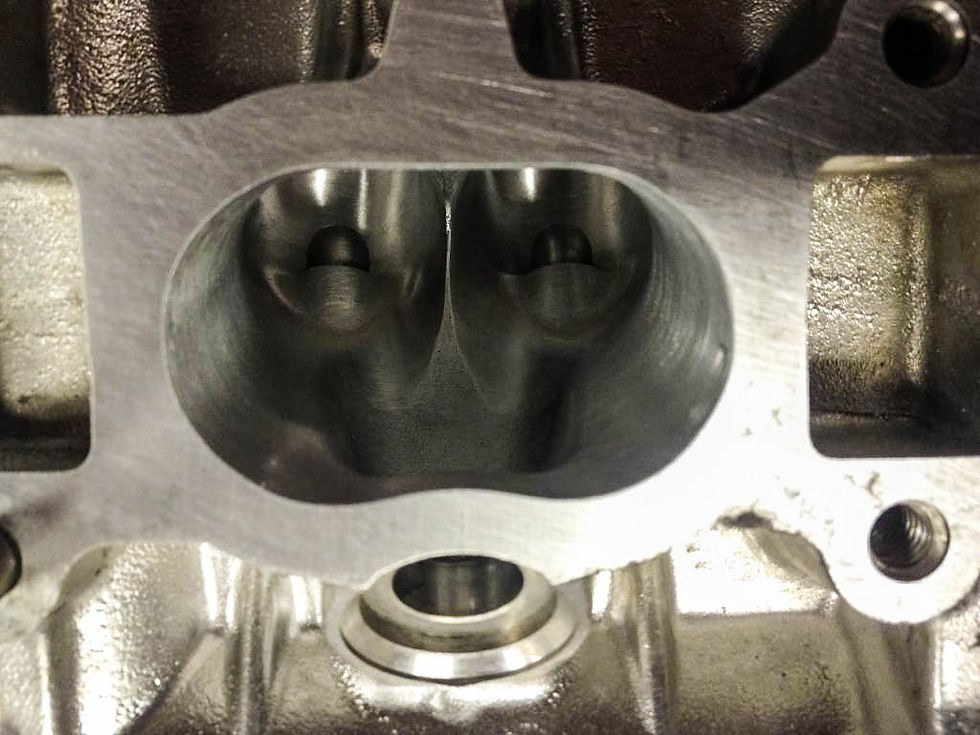
Finally, after talking to many people, I decided to send my cylinder head away for flow testing, this was the same head that Rogue had initially “ported and polished” as part of the first engine build, and I wanted to verify how it was working as well as collect flow data to help me specify some more suitable camshafts (I suspected the Catcam camshafts I had were bumping up the boost threshold for little/no top end gain).
Unfortunately the results weren’t great, the head did flow slightly better than stock, but nowhere near it’s full potential…this is the danger of hand porting cylinder heads without testing them, you simply cannot guarantee your results! Lesson learnt for me though- never accept this type of work without flow test data again.
After the flow test results I decided to seek a second opinion, so on Dave Rowe’s advice I contacted Rick and CNC Heads, who was more than happy to help. He took a good look at it, and threw some air through it and pretty much confirmed the results of the first set of tests.
He was not confident he could improve the head as it had already been taken a bit too far, so the best option was a fresh stock cylinder head and to start again. It took me a while to find one, but in the end Peter very kindly let me have the head he had stashed away for his own 3S build (which he abandoned after getting distracted by his silly Noble). It was a completely clean head which had already been machined for +1mm valves, so an ideal starting point…and away it went to Rick.

I managed to sell my existing cylinder head before receiving a nice call from Rick- my new cylinder head was ready, and confirmed to be flowing >300cfm at max lift (@28”), a serious improvement over stock. I was supremely happy with Rick’s work, and really can’t recommend them enough: they’ve done all their R&D work already and have writing CNC programmes on the basis of their best results. The net effect is you get the benefits of the research, but with lower machine costs and more consistent results as it’s all computer operated.

Fast forward to May 2014 and Peter has finished the engine build, and I dropped by to pick her up to come back home again…it had been a long wait, but fingers crossed it would be finally worth it…
Comments